In this one, we are gonna take a look at some quite useful add-ons on top of the ones discussed earlier. These have been accumulated from various other sources I have been going through.
More Extensions
Notebook extensions let you move beyond the general vanilla way of using the Jupyter Notebooks. Notebook extensions (or nbextensions) are JavaScript modules that you can load on most of the views in your Notebook’s frontend. These extensions modify the user experience and interface.
Let us discuss some of the useful extensions that have been missed out in the last article.
1. Hinterland
Hinterland enables code autocompletion menu for every keypress in a code cell, instead of only calling it with the tab. This makes Jupyter notebook’s autocompletion behave like other popular IDEs such as PyCharm and VCS.
AWESOME!
2. Split Cells Notebook
This extension splits the cells of the notebook and places then adjacent to each other. These will be of great use for comparing things for a presentation.
3. Snippets
With this you get a drop-down menu to the Notebook toolbar that allows easy insertion of code snippet cells from many popular libraries into the current notebook.
4. Collapsible Headings
Collapsible Headings allows the notebook to have collapsible sections, separated by headings. So in case you have a lot of dirty code in your notebook, you can simply collapse it to avoid scrolling it again and again.
DOPE!!
Slideshow
Notebooks are an effective tool for teaching and writing explainable codes. Jupyter Notebooks can be easily converted to slides and we can easily choose what to show and what to hide from the notebooks.
NO MORE POWERPOINT!!
This can be done in two ways:
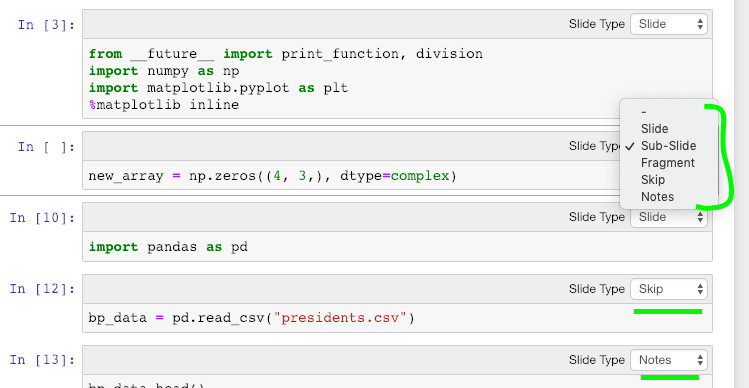
1. Jupyter’s inbuilt Slide
In your notebook navigate to View → Cell Toolbar → Slideshow. A light grey bar appears on top of each cell, and you can customize the slides.
Now go to the directory where the notebook is present and enter the following code:
jupyter nbconvert *.ipynb --to slides --post serve
# insert your notebook name instead of *.ipynb
The slides get displayed at port 8000. Also, a .html file will be generated in the directory, and you can also access the slides from there.
Here, you can see the code but cannot edit it. RISE plugin offers a solution.
2. RISE plugin
This I have already mentioned in my last article. RISE is an acronym for Reveal.js — Jupyter/IPython Slideshow Extension. It utilized the reveal.jsto run the slideshow. This is super useful since it also gives the ability to run the code without having to exit the slideshow. Install with:
#enable the nbextension:jupyter-nbextension enable rise --py --sys-prefix
Now we notice a new extension that says “Enter/Exit RISE Slideshow.”
Click on it. You get your interactive slides. Awesome!
Jupyter Widgets
Jupyter Widgets are eventful python objects that have a representation in the browser, often as a control like a slider, textbox, etc. Widgets can be used to build interactive GUIs for the notebooks. Install them with:
#Installing ipywidgets with conda automatically enables the extension
For complete details, you can visit their Github repository. For now, let’s have a look at some of the widgets.
Interact
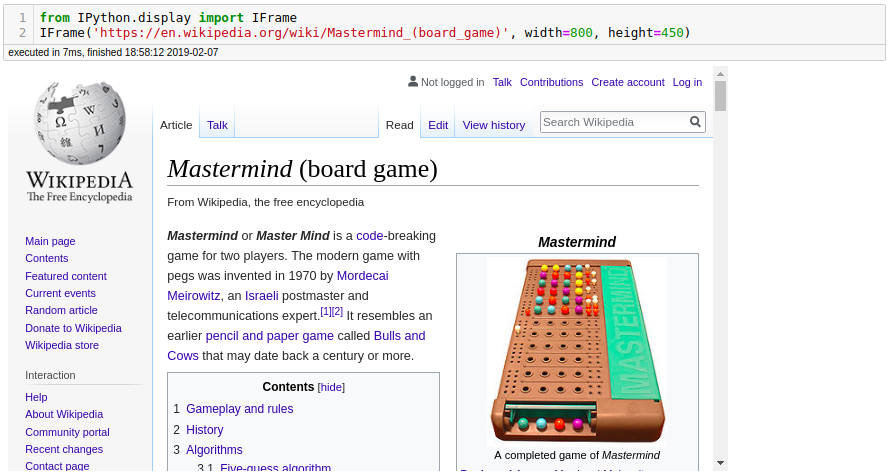
It is the easiest way to get started using IPython’s widgets. The interactfunction (ipywidgets.interact) automatically creates a user interface (UI) controls for exploring code and data interactively.
There are few actions less efficient in data exploration than re-running the same cell over and over again, each time slightly changing the input parameters. The ideal solution to this issue would be interactive controls to change inputs without needing to rewrite or rerun code. We’ll see how to get started with IPython widgets ( ipywidgets), interactive controls you can build with one line of code. This library allows us to turn Jupyter Notebooks from static documents into interactive dashboards, perfect for exploring and visualizing data.
IPython widgets, unfortunately, do not render on GitHub or nbviewer but you can still access the notebook and run locally.
# Start with some imports!
from ipywidgets import interact, interact_manual
import ipywidgets as widgets
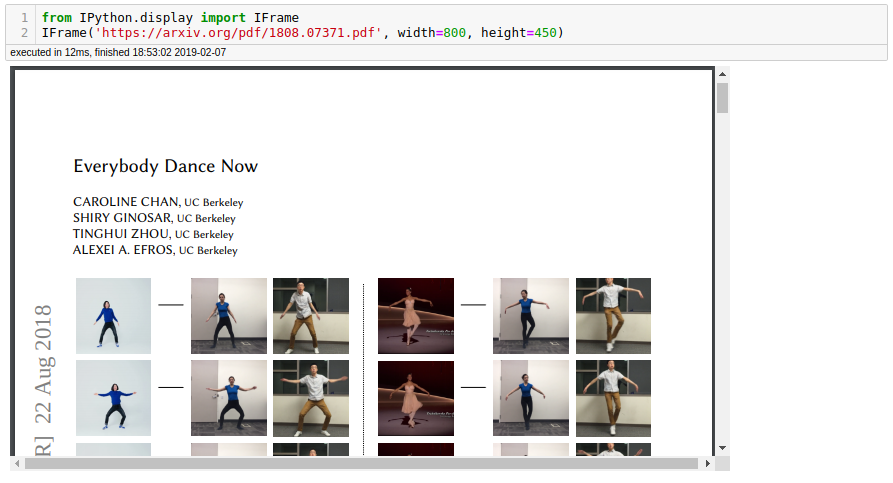
Now we can quickly cycle through all the images without re-running the cell. This might actually be useful if you were building a convolutional neural network and wanted to examine the images your network had missclassified.
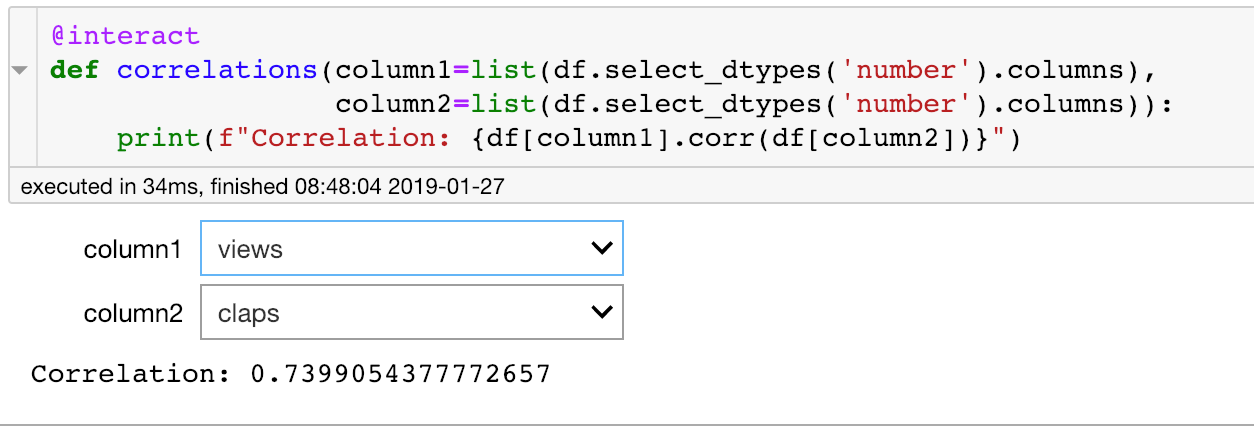
The uses of widgets for data exploration are boundless. Another simple example is finding correlations between two columns:
The Play widget is useful to perform animations by iterating on a sequence of integers at a certain speed. The value of the slider below is linked to the player.
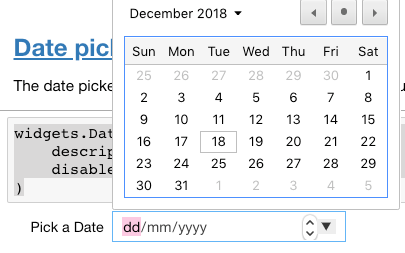
The date picker widget works in Chrome and IE Edge but does not currently work in Firefox or Safari because they do not support the HTML date input field.
widgets.DatePicker(
description='Pick a Date',
disabled=False
)
4. Color picker
widgets.ColorPicker(
concise=False,
description='Pick a color',
value='blue',
disabled=False
)
tab_contents = ['P0', 'P1', 'P2', 'P3', 'P4']
children = [widgets.Text(description=name) for name in tab_contents]
tab = widgets.Tab()
tab.children = children
for i in range(len(children)):
tab.set_title(i, str(i))
tab
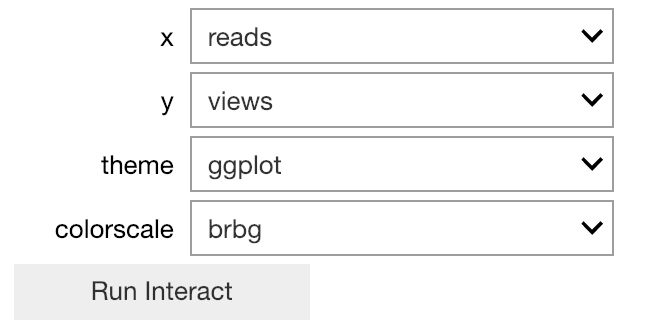
6. Widgets for Plots
Interactive widgets are especially helpful for selecting data to plot. We can use the same @interact decorator with functions that visualize our data:
Here, cufflinks+plotly combination is used to make an interactive plot with interactive IPython widget controls.
If the plot was a little slow to update, we can use @interact_manual which requires a button for updating.
7. Qgrid
Qgrid is a Jupyter notebook widget but mainly focussed at dataframes. It uses SlickGrid to render pandas DataFrames within a Jupyter notebook. This allows you to explore your DataFrames with intuitive scrolling, sorting and filtering controls, as well as edit your DataFrames by double-clicking cells. The Github Repository contains more details and examples. Install:
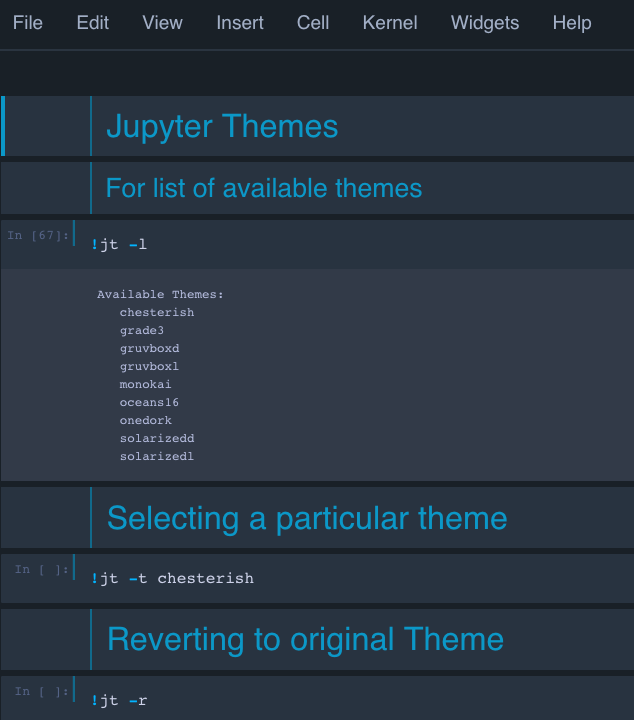
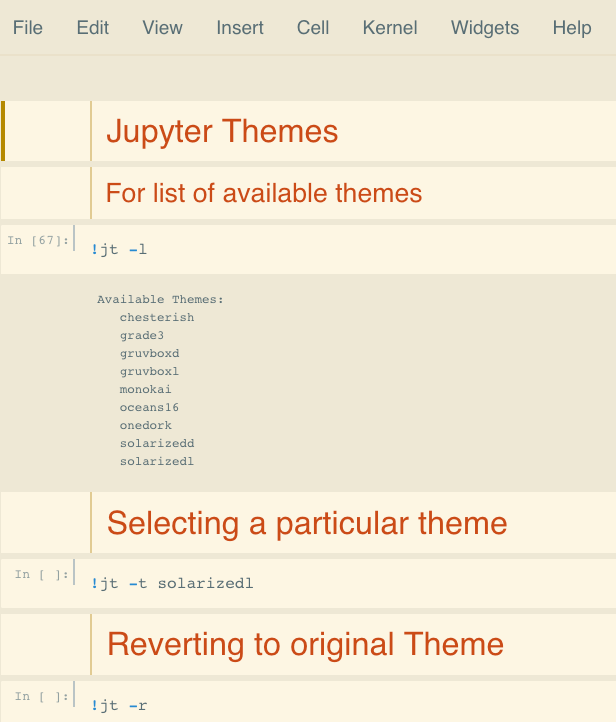
Just like your IDE’s schema or theme setting, Jupyter also have themes which can get the same thematic feeling. These themes also enhance the presentation of the code. For installation:
pip install jupyterthemes
List out the available themes with:
jt -l
Though not high in numbers, these are still pretty good and more are gonna come in future. Choose your favourite with:
jt -t <name of the theme>
Reset to original with:
jt -r
Chesterish and solarizedl
Wrapping Things Up

I urge you to read it as this one is adding more content to the last one. Install these Jupyter Notebook add-ons, spend some time figuring out which ones are useful to you, and improve your productivity. While none of these is life-changing, they all add just enough benefit to be worthwhile, cumulatively saving you hours of valuable development time.


No comments:
Post a Comment